Thursday 1 August 2013

Crochet Hook Storage

Any crafter will tell you, supplies and tools take up space. And they are best kept organised so you can lay your hands on what you're looking for just when you need it. Or is that just me?

I've built up a bit of a selection of crochet hooks, some cheapo plastic ones that came free with a magazine, some coloured metal ones, and loads of bamboos ones. I like the bamboo hooks the best, so much so that I've been selling them in my Etsy shop for some time now.

I like to have all my hooks together in one place in my crochet bag so that I always have the full range of sizes to hand as many projects I've done require more than one hook size. I've been using a pencil case to store them, but as my collection has grown, I find myself rooting around and emptying it out trying to find the hook I want. Annoying. For the longest time I have wanted a hook roll but between one thing and another I haven't bought/made one.

A few weeks ago I was perusing the online sale at Purple Linda Crafts and treated myself to a hook roll made by Sew Ray Me. I'm so pleased with it, now my hooks are organised and grouped in size order and so handy to grab the one I want!


The pattern is a bit different from my usual choice, in that it's not pink, but I really love it! There's even space for my pen which I use to mark my place on the pattern I'm using.


And it's not bigger than a pencil case once it's rolled up!


Wednesday 31 July 2013

Pimped up Flip Flops

Flip flops are great summertime footwear but do you ever struggle to find a nice pair that you like or that will go with most of your summer wardrobe? I do, but maybe I'm just picky. I came across a little tutorial on how to spruce up a pair of flip flops with a bit of crochet and just knew I had to give it a go!

I got my hook out and a few leftover bits of yarn and got to it.


Rubbish late night Instagram pic


It's a quick and easy projects and you could easily make a whole wardrobe of crochet flip flops! Sometimes the straps are a but plastic-y and can make your feet sweaty, so covering them in this way is a great way to avoid that.

Pimped up flip flops
In hindsight, I should have used a cotton yarn rather than acrylic but they still work well. I just feel these look a bit woolly for flip flops, but I think they're cute! I quite like them and will certainly be stocking up on flip flops to jazz up!

To do these, I simply double crocheted (single crochet if using US terms) around the straps, making sure to bunch the stitches up so the rubber part didn't show through. Avoid crocheting around the toe post as I think that would be uncomfy to wear. For the bow, I made a strip of 12 double crochets and did 5 rows and then bunched it up in the middle by wrapping yarn around to make it bow shaped. Then I sewed the bow onto the straps and hey presto!

Who's been inspired to pimp theirs up?

Tuesday 30 July 2013

Pram Hydration Station

I always have a bottle of water with me whenever I leave the house. It's a habit I've had for years, and it greatly contributes to my drinking 2-3 litres a day. Pushing a pram around, especially in the heat we've had recently, is thirsty work and in a bid to make my life a bit easier when it comes to rehydrating, I have been on the lookout for a nice but practical water bottle holder. Well, they apparently don't exist! So I decided to make my own based on a few ideas I found floating around on Pinterest.

As I've mentioned in the past, I'm not a great sewer and me and my sewing machine have a love/hate relationship, but I decided to look past that and get making. And boy am I pleased with my first water bottle holder!!

Pram Hydration Station

The way my pram (I drive a Mothercare Spin in limited edition black jacquard, for those of you who may be interested) folds, I need something that can quickly and easily be taken off the handle bar, and many of the shop bought items I've seen just don't offer that, hence my own creation. This bottle holder wraps around the handle bar and secures with two popper studs. It literally takes 5 seconds to put on/take off and that's just what us Mummies want when packing and unpacking the pram for a trip out of the house.


I used some scraps of floral fabric I had in my stash and borrowed Mr PC's popper stud gadget, so this wee project didn't cost a penny! Those are the best kind of projects, aren't they? 


What I really like best about this bottle holder is that it's so versatile. It will fit onto pretty much any type of pram and can be positioned anywhere you want it, unlike so many branded bottle holders which have to go on a specific part of the pram chassis. You can also use it for a baby bottle, and possibly for your takeaway coffee cup, although I have yet to test it for this purpose.

I uploaded a pic onto my Instagram feed and it was very well received with several people wanting to purchase one, which was a great surprise! I am currently working on some ideas and they will be appearing in my Etsy shop in the near future, so keep an eye out there for them. 


Monday 29 July 2013

My First Baking Competition

Last weekend we headed off to the Essex Food and Drink Festival for a family day out. It was the cloudiest day we've had in months and yet I managed to get sunburn... no idea how that happened!

Our main reason for going to the event, apart from wanting to stuff our faces, was to see Paul Hollywood who was going to be doing some bread demos. I also decided to enter the baking competition as he was judging. It seems the competition was a great attraction as there were about 60 lemon drizzle cakes entered (the category was pre-determined)! Sadly I didn't win, which is ok considering the competition. But if there was a prize for presentation, I would have deserved to win as my cake was the only one displayed on a fine bone china plate. Just saying.


My lovely plate and cake

These are some of the other entries:

Yes, that would be HALF a cake at the bottom! Who does that?!

Some folk didn't even take them out the boxes they brought them in!


The bread category wasn't very popular

The youth category was scones and this little cake stand was so cute!

The man himself put on a great show, he told loads of funny stories about Bake Off and had many anecdotes about Mary Berry too which amused us all. He demonstrated flat breads as that's about all you can make in terms of bread, in just 45 mins. He's a pretty cool guy, regardless of whatever the tabloids have said about him. He knows his stuff and did a Q&A session at the end which was good. He was particularly impressed with the 12 year old boy who makes all the bread for his family on a weekly basis and the 11 year old boy who makes the 8 strand plaited loaf on a regular basis. The boys both asked very good detailed questions which really amazed everyone. Good for them, I say!


The rest of the day was good too but I have no pictures of that as I was too busy looking and eating my way round the stalls. It's certainly worth the £8 entry ticket! I wonder who they'll have there next year?

Saturday 27 July 2013

Sublime Baby Poncho

Oohh, look at me blogging twice in a row!

Today I'm showing off my latest make for Poppet, a poncho! When I was a teenager, ponchos were all the rage but not crochet ones. Crochet was not cool. I had a grey fleece one with a funnel neck, it was tres chic because it was from Next and it cost me several weeks pocket money in the sale. Anyway, I digress. Apparently ponchos are back and they are cool and crochet is cool again, so when I saw a pattern in my copy of Cute and Easy Crochet Baby Clothes, I just had to make it!


As usual, I didn't have the suggested yarn, but I did still have some gorgeous Sublime Cashmere Merino Silk DK  (I think this is my top fave yarn ever) which I've previously mentioned here and here and here. This stuff is utterly sublime to work with and it washes up pretty well. I also made Poppet a turban with it and it still looks pretty good after umpteen washes.

The stitch is a cluster stitch I hadn't tried before but once I got the hang of it, I flew through the patten. It took a lot of yarn to make, I used four 50g balls which I think is a lot consideing it's a baby item. It was a quick project as it only took a few hours to hook up and it is absolutely adorable! 


I added a couple of rows of dc around the neckline as the foundation row was a bit stretchy and I think I added a few rows on the bottom as Poppet is quite tall and I want it to last that wee bit longer. I wish you could feel the srumptiousness of this stitch, it's just lovely. I don't have any pics to share of Poppet modelling as a) it's summer and way too hot for a poncho! and b) Mr PC and I have decided not to feature her on the blog for reasons I'm sure I don't have to explain. I hope you can imagine the poncho's loveliness from the below pic.


Roll on the return of poncho season! I may even work out how to make one in mummy size!

Friday 26 July 2013

Giant Granny Square Rug

Hello! My crafty endeavours are regularly gazumped by a lack of time/energy by the time my Mummy duties are done for the day. However, I do manage to get some things done from time to time and today I want to show you my giant granny square rug which I made for our bedroom.

This rug has a bit of a back story in that I've wanted to make a giant doily rug for the longest time and finally got my hands on a pattern and then realised it was just going plain wrong! The particular pattern I chose is, in my opinion, not suited to being a rug as it came out too flimsy and would have been a major trip hazard. So after rethinking and making it again using another pattern and that failing, I decided to make it into a granny square. If in doubt, do a granny!

It proved rather difficult to photograph the rug in situ but here are the best shots I got!


I used DMC Zpagetti in Fuchsia to make this and used about 1.5 spools. I've previously used Hoopla for smaller projects, and Zpagetti is very similar. I found it to be less stretchy than Hoopla which I thought important for a rug. It is also easily washable which is handy. I was, however, very disappointed in the number of knots in the yarn. I'm talking dozens! This meant that I had a LOT of ends to sew in as cutting them out was the only option, they were so unsightly. But apart from that, Zpagetti is pretty good stuff to work with, altho it is a workout on your wrists!

Here's some pics of the rug's original incarnations:

You get more per spool than you do with Hoopla!


The original pattern, it looked lovely but not very practical


The second attempt, different pattern but I had issues up scaling it. 


It looks great in our bedroom but it took a while to get used to is as we kept walking round it for about two weeks! Poppet loves it as she can stick her fingers in the gaps and it feels kinda squishy!

The clusters are so touchy-feely!

The best aerial view, as modelled by Sophie Giraffe

Rug Facts
Yarn: Zpagetti, in Fuchsia 1.5 spools
Measures: 1metre x 1metre, 13 rounds made
Hook: 12mm

If you'd like to have a go at making your own rug and need large crochet hook, checkout my Etsy shop where you can purchase a lovely handmade hook perfect for some extreme crochet!

Monday 3 June 2013

Crochet Catch Up

In writing about my Massive Granny Blanket, I remembered I have also made some smaller items in recent months. Sometimes those granny squares just got too dull, or too big to lug about when out and about. I thought I'd show off share some pics of my other wee projects.

First up, a large, single granny square baby blanket for a friend's baby boy. I found this one kind of boring as it seemed to take and inordinate amount of time to do considering it was actually only small.


Ran out of wool with 12 stitches to go!


I found a cardi in the Next sale which I wanted to spruce up so picked a lovely doily pattern from Inverleith's book, 500 Crochet Blocks (you must buy this gorgeous book, Hannah and Kath did a stupendous job and the patterns are swoon-worthy!) and voila, a jazzed up cardi!


I made a ruffle skirt for Poppet in our favourite colour.


A pants picture but look at the cuteness!!


Poppet modelling her new skirt

And my current WIP is a new cover for my hot water bottle.


All in all, not too bad for a new mum with little spare time!

Sunday 2 June 2013

Massive Granny Square Blanket

After Poppet was born, I seemed to lose my crafting mojo for a while and I just didn't have the time or the brain cells to give to anything other than doing nothing whenever I had a bit of free time. I guess most new mothers have to let go of something during the first few months of adjusting to life with a baby, and I let go of crafting. But guess what peeps, I've well and truly grabbed a tight hold of it again!

Although I just couldn't get excited about doing/making something, I did miss it and once I started getting ideas in my head again I knew that it was time to get hooking. I wanted something quick and easy which I could pick up and put down easily without having to go back and work out where I left off. Sometimes I only get a few mins of crochet time before needing to attend to Poppet who has rolled over/got stuck/needs a new nappy... you get the drift. So I started making granny squares, you know, to ease my brain in gently. After a few were done I wondered what to do with them and somehow came to the conclusion that I should use up my scraps and make a blanket.


The very beginning
As I was using scraps, I decided to make the squares in 4 rounds and some only came out as 3 rounds but they're saved for a future project, whatever that may be. I sewed four small squares together to make a big square and then did a couple of rounds of random colours finished with a round of cream on each one.


I had no plan for this blanket except to be as random as possible. Being random was SO difficult for my organised self! I even used colours I don't like! It was strange to be working on something without a vision in mind, but I just went with it and let it come about of its own accord. 

When deciding the final layout, I wanted to make sure not to have the same colours repeated or too close together. It was like a crochet version of sudoku and boy was it tricky! Then I got bored with the millionth layout so labelled them all up so I knew which was which and got stitching together! There are a few 'mistakes' in the layout, but I decided nobody would even care and I decided not to care about it either.


Starting to stitch it together

As it came together, it was getting rather heavy, so I had to pile it up on the couch next to me and shuffle it round every so often. I kept me warm on some of those chilly winter spring evenings which was quite handy.

   
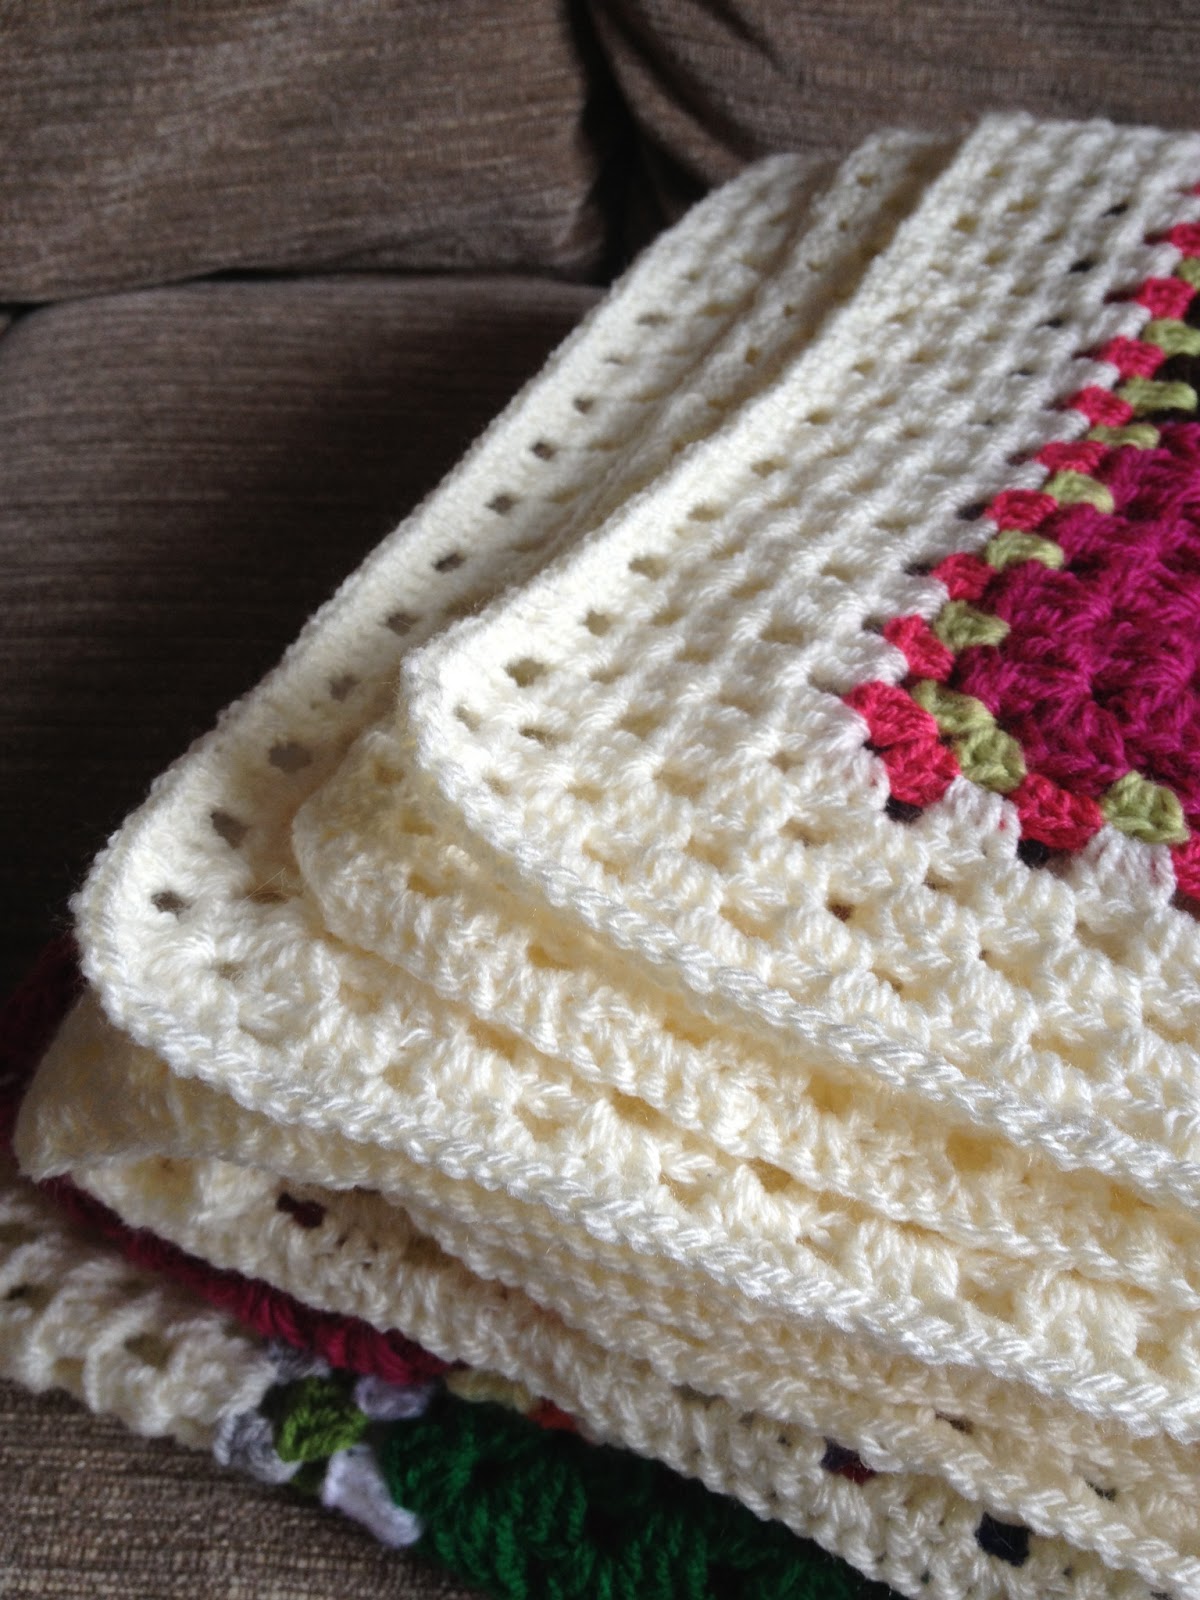
I decided to keep it simple and just do a few rounds of cream as a border. As there are so many random colours I thought the cream would help bring it all together and tone it down at the same time. After much thought and consultation with fellow crocheters, it was agreed that the best edging would be a simple row of double crochet. This surprised me as I had always planned a semi elaborate edging but it just didn't look right. This meant that the blanket was finished before I had expected it to be and so I was quite surprised that it was finally done!

And here is it in all its multicolour glory, draped along the (three seater) couch.


This is my favourite square of all.


And this is the very middle of the blanket.


Blankety facts:
100 small granny squares
millions of sewing stitches
25 giant squares in total
5x5 squares layout
4 rounds of granny in cream
1 round of double crochet
loads of odds and sods used up
3 balls of Stylecraft DK in cream purchased
total cost of blanket, £6
time to hook up, approx 5 months
approximate size of a king size bed


The lovely neat double crochet edging just finishes it off nice and tidy.


The blanket's current residence is on our Ikea rocking chair as it doesn't yet have a purpose and it must be admired by all.


Related Posts Plugin for WordPress, Blogger...