Showing posts with label home. Show all posts

Friday, 26 July 2013

Giant Granny Square Rug

Hello! My crafty endeavours are regularly gazumped by a lack of time/energy by the time my Mummy duties are done for the day. However, I do manage to get some things done from time to time and today I want to show you my giant granny square rug which I made for our bedroom.

This rug has a bit of a back story in that I've wanted to make a giant doily rug for the longest time and finally got my hands on a pattern and then realised it was just going plain wrong! The particular pattern I chose is, in my opinion, not suited to being a rug as it came out too flimsy and would have been a major trip hazard. So after rethinking and making it again using another pattern and that failing, I decided to make it into a granny square. If in doubt, do a granny!

It proved rather difficult to photograph the rug in situ but here are the best shots I got!


I used DMC Zpagetti in Fuchsia to make this and used about 1.5 spools. I've previously used Hoopla for smaller projects, and Zpagetti is very similar. I found it to be less stretchy than Hoopla which I thought important for a rug. It is also easily washable which is handy. I was, however, very disappointed in the number of knots in the yarn. I'm talking dozens! This meant that I had a LOT of ends to sew in as cutting them out was the only option, they were so unsightly. But apart from that, Zpagetti is pretty good stuff to work with, altho it is a workout on your wrists!

Here's some pics of the rug's original incarnations:

You get more per spool than you do with Hoopla!


The original pattern, it looked lovely but not very practical


The second attempt, different pattern but I had issues up scaling it. 


It looks great in our bedroom but it took a while to get used to is as we kept walking round it for about two weeks! Poppet loves it as she can stick her fingers in the gaps and it feels kinda squishy!
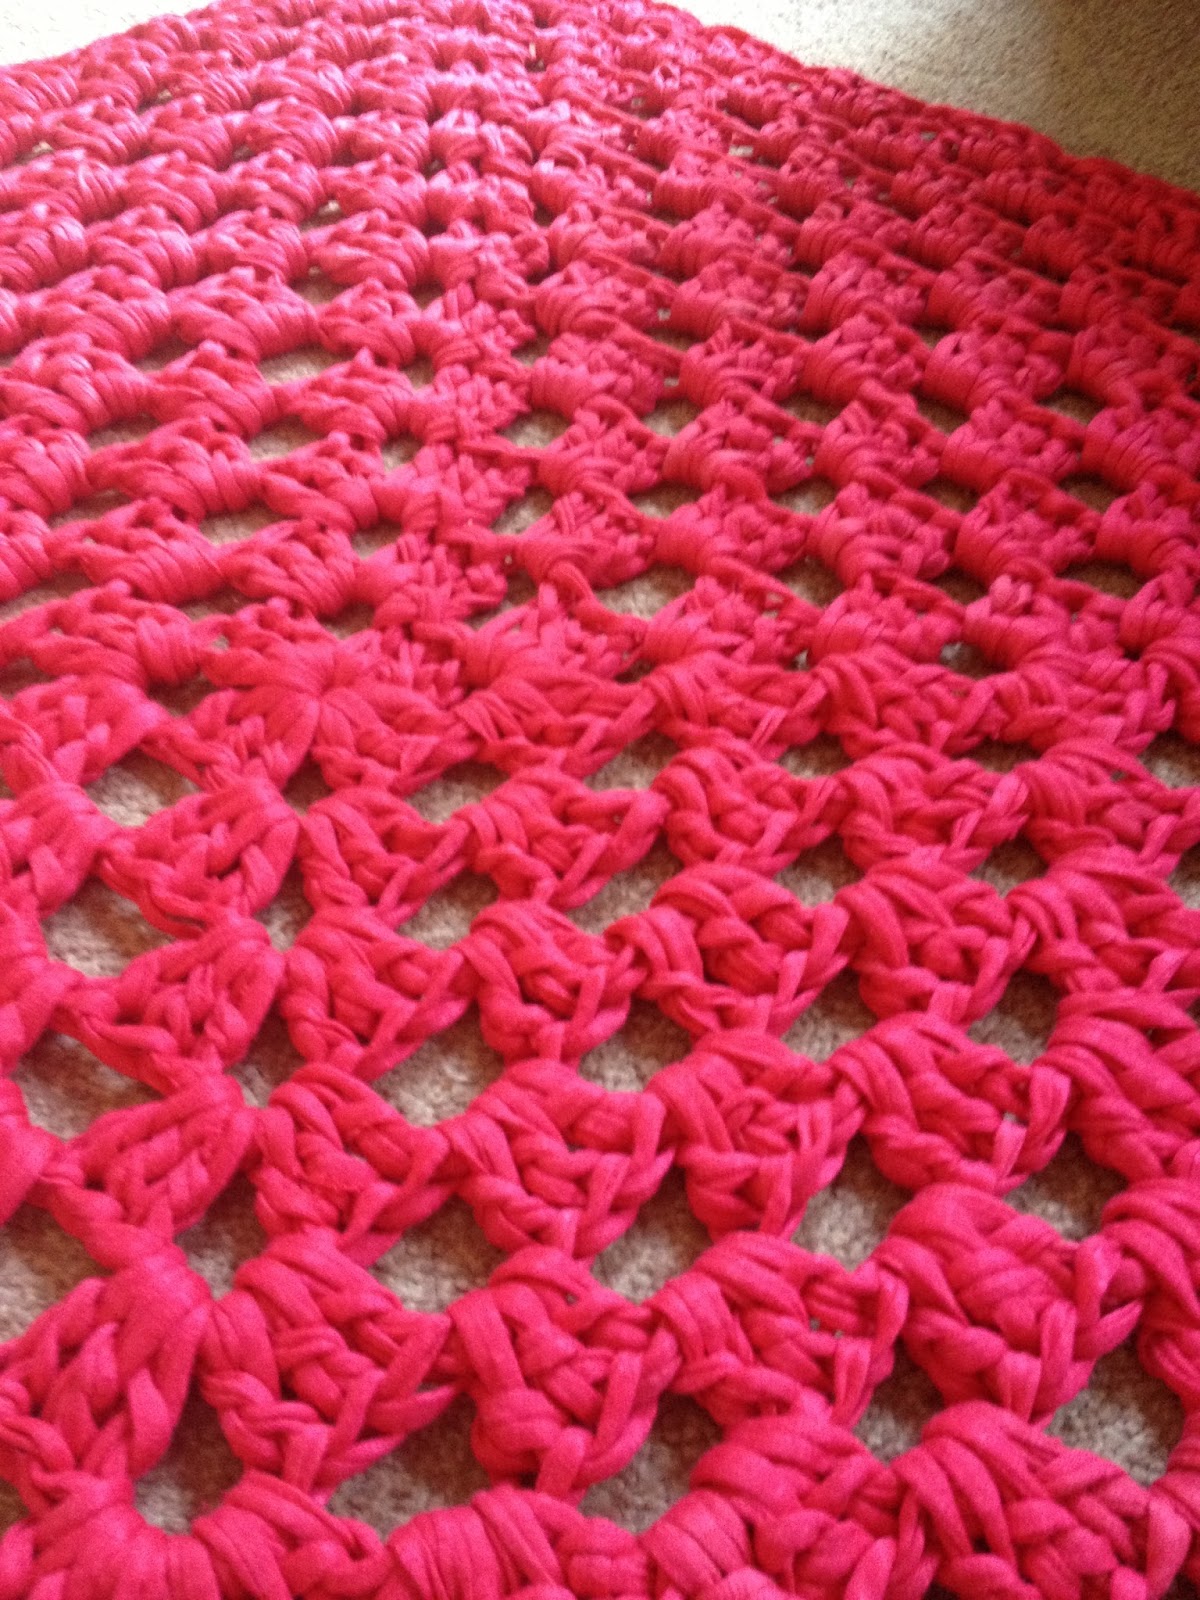
The clusters are so touchy-feely!

The best aerial view, as modelled by Sophie Giraffe

Rug Facts
Yarn: Zpagetti, in Fuchsia 1.5 spools
Measures: 1metre x 1metre, 13 rounds made
Hook: 12mm

If you'd like to have a go at making your own rug and need large crochet hook, checkout my Etsy shop where you can purchase a lovely handmade hook perfect for some extreme crochet!

Thursday, 13 September 2012

Lampshade spruce up

We are finally nearing the end of Project Nursery, and boy has it been a long process! I won't bore you with the details, but suffice to say, it has involved a lot of 'argh when is this going to end' moments. Today I want to show off my spruced up lampshade.

The nursery is pink and white and so I took a plain boring white lampshade from Ikea (where else?!) and got myself some trimmings which I glued on with the glue gun. You gotta love a glue gun, it's great for everything!

Here's how the lampshade looks now it's hanging in the nursery.


Pink ric rac, white ric rac and some mini pink pom pom trim.


Wednesday, 12 September 2012

Table makeover

We recently bought a new arm chair for the living room and after having it for a while, I decided we needed a wee table to go with it so that we had somewhere to put a drink, tv remote etc. Mr PC was going to build one from some mahogany he got from Freecyle (love free stuff!) but as he's had so many other projects on his plate this summer we decided to just buy one. A trip to Ikea was in order! We bought this cheap and cheerful table for a spiffy £7! 
NESNA Bedside table IKEA Bamboo, a hardwearing natural material. 
We didn't like the glass top or the slats, so Mr PC used some plywood to replace them with. Then I got to do some wood staining! Normally I'm not 'allowed' to do jobs like these because he prefers to do them and thinks himself an expert (which he kinda is, but don't tell him I said so), but in the interest of having the table asap, I got the brush out and got stuck in!


Whilst I liked the table once it was stained, there was something missing...


...a bit of granny action! I quickly whipped up a granny square to cover the top and made it just long enough to hang over the edge of the table top. I weaved in some elastic to make it nice and snug and hey presto, and splendid new table which cost a mere £7!!
 

 The new arm chair is super comfy and has become a bit of a handmade nook which I just love!


Wednesday, 20 June 2012

Re-Covered Desk Chair

Do you ever look around your office/craft space and think 'I'm so bored of this room'? Well, I have recently, and it's probably because there are plans for the room to become the nursery in the next few months so I haven't made any changes to my office in ages. I actually want to just get stuck into putting the nursery together but that's another story!

Last night I felt the need to spruce up something in my office and so rummaged through my fabric stash and rediscovered this owly print:


I'm not particularly an owl print fan but I bought this fabric last year when owls were 'bang on trend' and made a few things which sold quite well. I had some left over which went back into the box for a rainy day. Ages ago I saw a pin on Pinterest from someone who recovered their desk chair so when I found it again yesterday it sparked an idea.

My comfy yet increadibly dull looking desk chair has now gone from this...


...to this:


The old fabric was a weird felt that every piece of fluff/cat hair stuck to like glue and so it always looked grubby (dislike). The owl print is a cross between a cotton and a linen so hopefully will not be a lint magnet. It looks rather spiffy if I do say so myself!

I simply took the plastic back off and unscrewed the base and then stapled the new fabric over the top of the cushions. Hey presto, 30 minutes later, and nicer looking chair! And the best bit is that when I do eventually move my office space into Mr PC's office, I can take my cool chair with me!

Thursday, 26 April 2012

A hint of colour

We recently redecorated the hall, dinning room, stairs and landing and spruced the place up a bit after nearly four years of a cream colour on the walls. I was fed up with the boring-ness of the cream and the walls were starting to look grubby. After consulting my sister on what colours and shades to go for, we opted for a deep purple feature wall in the dining room and a deep ocean blue on the wall that goes up the stairs.

I've managed to get some mediocre pics to show you, but the grey horrible weather and the dreadful light we've had this week has meant that you don't get the best out of these colours. Hey ho! 


Pictures are of Rome which we took on our honeymoon


Be gone boring cream wall!
 The rest of the walls are now a warmer shade of cream which has made such a difference. We have a rather dark hall and landing so we had to stick with a light colour so not to end up with it looking like a black hole! With all the woodwork repainted white, it looks all new and clean which delights me greatly!

Mirrors free from my sister who was ditching them, pictures were an engagement gift

The next room on the list for redecorating is my office which will become the little poppet's nursery but this is on hold until we know whether it's a boy or a girl. I'm not really looking forward to giving up my only personal space in the house, but I guess it will be worth it in the end!

Friday, 6 January 2012

Making space

I got some great kitchen related pressies for Christmas, including a refurbished Sunbeam Mixmaster (from 1954!) which Mr PC repaired, resprayed and even put my name on!


And I got a brand new food processor and several cake tins and cake decorating equipment. 


On Boxing Day I looked at all my new stuff and wondered where on earth we were going to put it all! Our kitchen is tiny boutique and space is at a premium! Cue Mr PC who suggested he could build some extra drawers underneath the existing cabinets. After a couple of days of measuring, sawing, screwing and banging this is what he made:


All the various attachments for my mixers and processors fit in here!


A bits and bobs drawer

This one's full of cake tins!

The top drawer here is one we put in a couple of years ago and it houses the baking trays for the oven

Three fab drawers (and yes that really is the size of my kitchen!)

How about that then?! What genius use of otherwise wasted space! We can't believe it took us this long to think of it!! In an ideal world we would have a much larger kitchen or at least we would refit it so the cupboards are better distributed but we haven't won the lottery yet. In the meantime these drawers will make life easier!

And on the subject of kitchen storage, I thought I'd share a pic of a pan rack which we installed as soon as we moved in. It's great for hanging the pans and all the random things that don't fit in the cupboards! When you have a piddly small kitchen, every inch of space is needed and this does it perfectly!!


Related Posts Plugin for WordPress, Blogger...